EV System Exploded View
One diagram that shows the whole EV — battery to motor, part by part
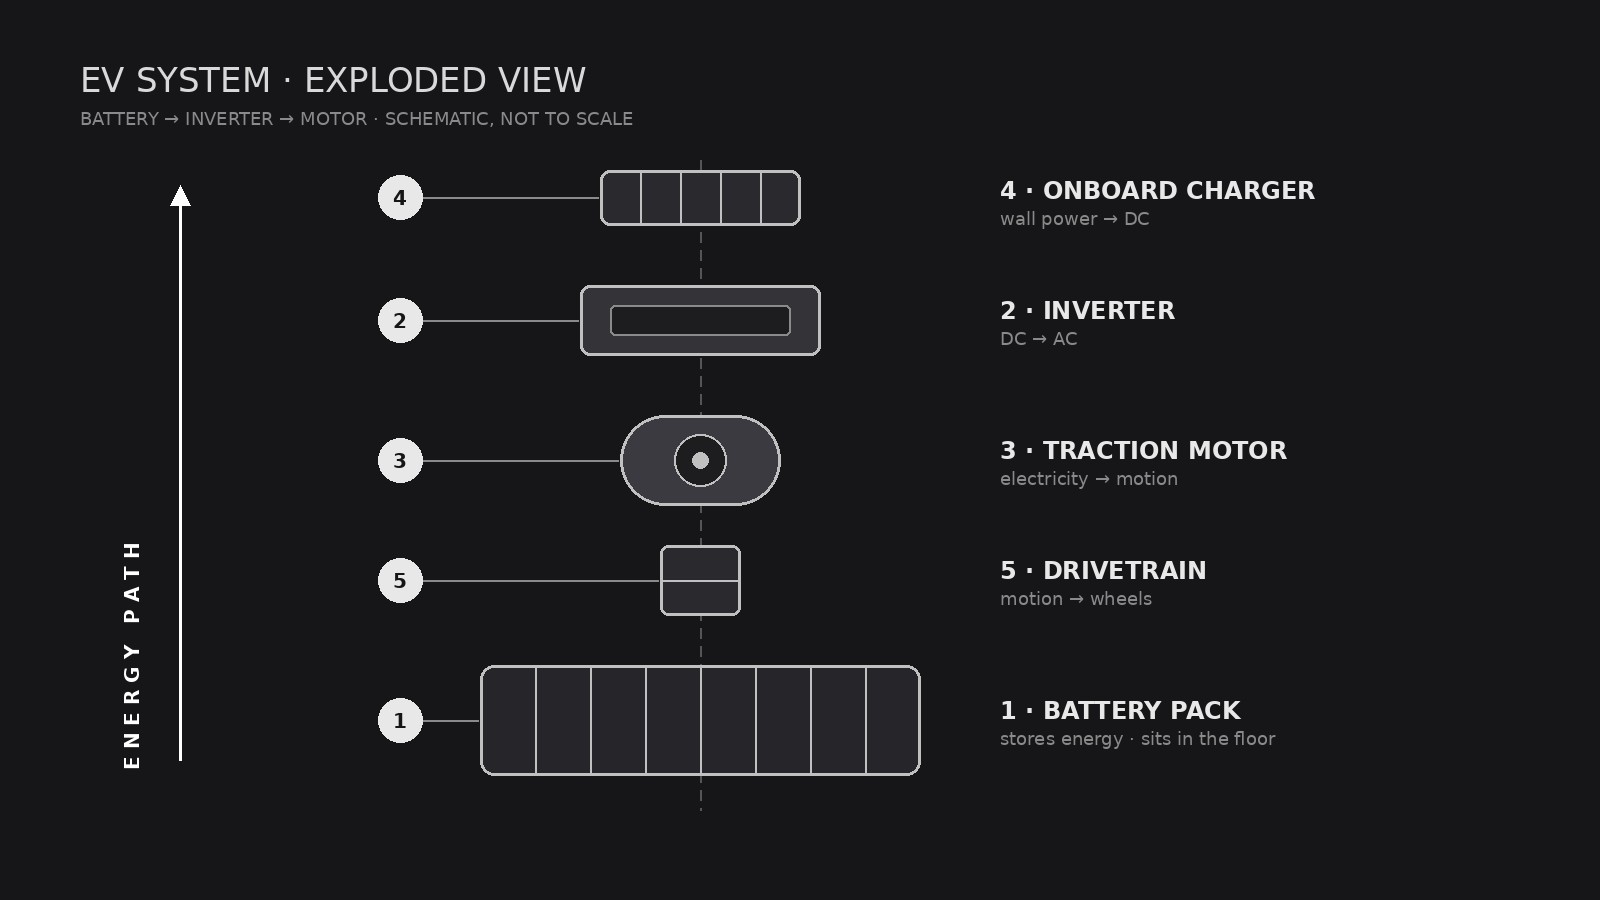
Turns your AI into a technical illustration assistant that lays out an electric vehicle's drivetrain, battery, and power electronics as a clean exploded view with numbered callouts anyone can read.
Install it in 3 steps
No sign-up. No CLI tools. Pick your AI, copy one line, paste it over.
Prefer doing it yourself? Buy the skill ($4.99), download the ZIP from your checkout confirmation, unzip it into the directory shown above, restart your AI session — same result. Already bought it? Your AI assistant can download it for you.
What’s inside
One SKILL.md (the playbook) + one starter template. A preview:
EV System Exploded View
When to use
- You are explaining how an EV drivetrain fits together to students, customers, or new hires and a photo of the assembled car hides everything
- A pitch deck, manual, or museum display needs one diagram that shows battery, motor, inverter, and charger in relation
- Your engineering team wants a shared reference poster for a teardown or design review
- You are writing an article about EV architecture and need a diagram that labels parts without drowning readers in jargon
- A sales page needs to show what is inside the vehicle without revealing proprietary detail
Workflow
- Define the system boundary (input: vehicle or subsystem → output: parts list scope)
Decide what the diagram covers: the full vehicle (battery, motor, inverter, onboard charger, thermal system, drivetrain) or one subsystem (for example, the battery pack only). A full-vehicle view gets 8–14 parts; more than that and labels collide. Write the scope down before drawing — it decides everything else. - Inventory the parts (input: scope → output: numbered parts list)
List every part that will appear, in assembly order, with its plain-language name and one-line function: for example, "Battery pack — stores energy; sits in the floor." Use generic component names the reader already knows. If a part's function is uncertain, leave it out or mark it as unchecked — never label a guess as fact. - Set the explosion axis (input: parts list → output: layout sketch)
Choose one explosion direction — usually vertical (stacked along the car's height) or along the drivetrain line (front to back). Parts slide apart along that axis with even gaps; nothing rotates, nothing overlaps. Sketch boxes in order first, then draw the real shapes inside the boxes. Consistent gaps are what make the diagram read as "exploded" instead of "scattered." - Draw and label (input: layout sketch → output: finished diagram)
Draw each part in the same visual language: same line weight, same shading, same level of detail. Number every part and connect it to its label with a thin leader line — labels sit in a clean margin, never on top of parts. Use one accent color at most, reserved for the energy path (battery → inverter → motor). - Check readability (input: finished diagram → output: approved file)
Shrink the diagram to the size it will actually be shown at and read every label. Check: can a non-engineer name each part and say where it sits? Do any leader lines cross? Is the energy path traceable with a finger? Fix crossings and crowding before shipping.
Output spec
Template preview
EV System Exploded View — Template
Fill this in before any drawing starts. One diagram = one system boundary.
System: {full vehicle / battery pack / motor + inverter / other}
Vehicle type: {battery-electric / hybrid / dual-motor} | Audience: {students / customers / engineers / general readers}
Parts list (assembly order, 8–14 parts)
Parts left out (and why): {too detailed / unconfirmed / out of scope}
Layout
Explosion axis: {vertical / front-to-back} Energy path (accent color): {battery → inverter → motor} Diagram ratio: {16:9 / poster}
Legend (one line per part)
- {Part} — {function}
- {Part} — {function}