Skin Mechanism Visual
How skin works, shown layer by layer.
Turns your AI into a skin-science visual explainer — builds a clear, accurate diagram of how skin is layered and how it works, with plain-language labels and a step-by-step mechanism sequence for education, skincare, or health content.
Install it in 3 steps
No sign-up. No CLI tools. Pick your AI, copy one line, paste it over.
Prefer doing it yourself? Buy the skill ($4.99), download the ZIP from your checkout confirmation, unzip it into the directory shown above, restart your AI session — same result. Already bought it? Your AI assistant can download it for you.
What’s inside
One SKILL.md (the playbook) + one starter template. A preview:
Skin Mechanism Visual
When to use
- A skincare brand needs to explain what its product does without resorting to vague "deep repair" claims
- A health educator wants a diagram of skin layers for a lesson, handout, or patient leaflet
- A beauty or dermatology blog post needs a visual that shows a process (how skin renews itself, how it keeps water in) instead of just naming parts
- A packaging or poster project needs a clean cross-section of skin that a non-expert can read
- A training deck for salon or clinic staff needs one shared picture of how skin works to anchor the lesson
Workflow
- Define the audience and the one mechanism (input: topic → output: scoped brief)
Pick one mechanism and one audience: "how skin renews itself, for skincare shoppers" beats "everything about skin, for everyone." Write the brief as one sentence — audience, mechanism, and the one thing the reader should understand after looking at the visual. If the brief needs an "and" to finish, it is two visuals; split it now rather than cramming two processes into one diagram. - Map the three layers (input: brief → output: layer map)
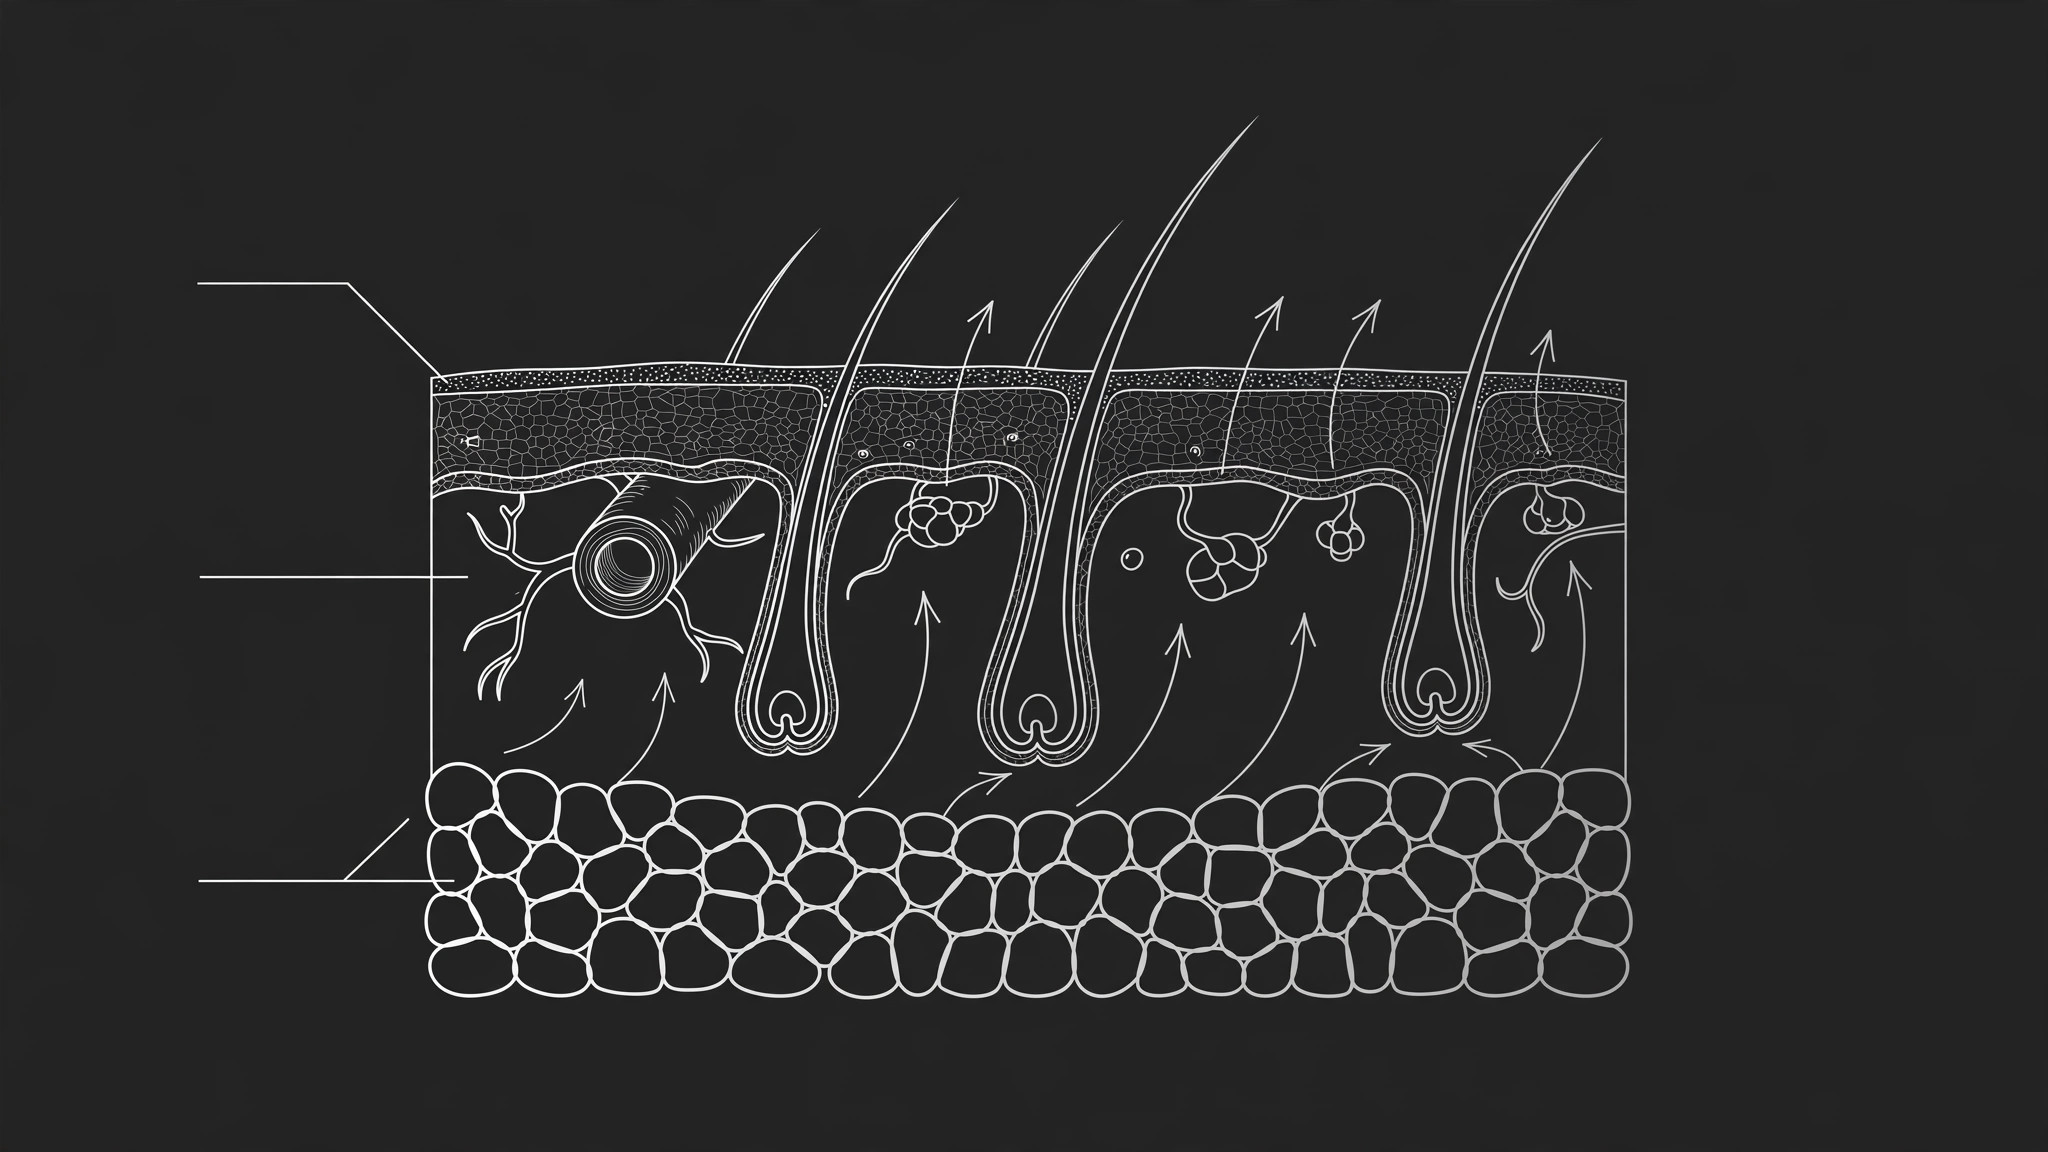
Draw skin as a cross-section with its three widely described layers, outermost first: the epidermis, the thin outer layer that forms the barrier and sheds surface cells; the dermis, the thicker middle layer holding collagen and elastin fibres, blood vessels, nerves, sweat glands, and hair follicles; and the hypodermis (also called the subcutis), the deepest layer of fat that insulates and cushions. Keep the proportions honest — the epidermis is thin compared with the dermis — and label each layer once, in plain words, with the technical name in parentheses if your audience needs it. - Show the mechanism in motion (input: layer map → output: process sequence)
A mechanism is a process, not a parts list: show it as a short sequence of 3–5 steps with arrows across or beside the cross-section. For renewal, show new cells forming low in the epidermis, moving upward as they flatten, and shedding from the surface. For moisture, show water held in the outer layer and the barrier slowing its escape. Each step gets one short label and one visual change; if a step has no visible change, it does not belong in the diagram — put it in the caption instead.
Template preview
Skin Mechanism Visual — Template
One visual = one mechanism = one audience. Educational only — not medical advice.
Brief (one sentence)
Audience: {who will read this} Mechanism: {the one process to show, e.g. how skin renews itself / how the barrier holds water in} Reader should understand: {the one thing they take away}
Layer map (cross-section, outermost first)
Proportions: {epidermis thin vs. dermis — keep honest} Label style: {plain words first, technical name in parentheses}
Process sequence (3–5 steps, arrows, one label + one visible change each)
- {step} — visual change: {what moves / appears / leaves}
- {step} — visual change: {…}