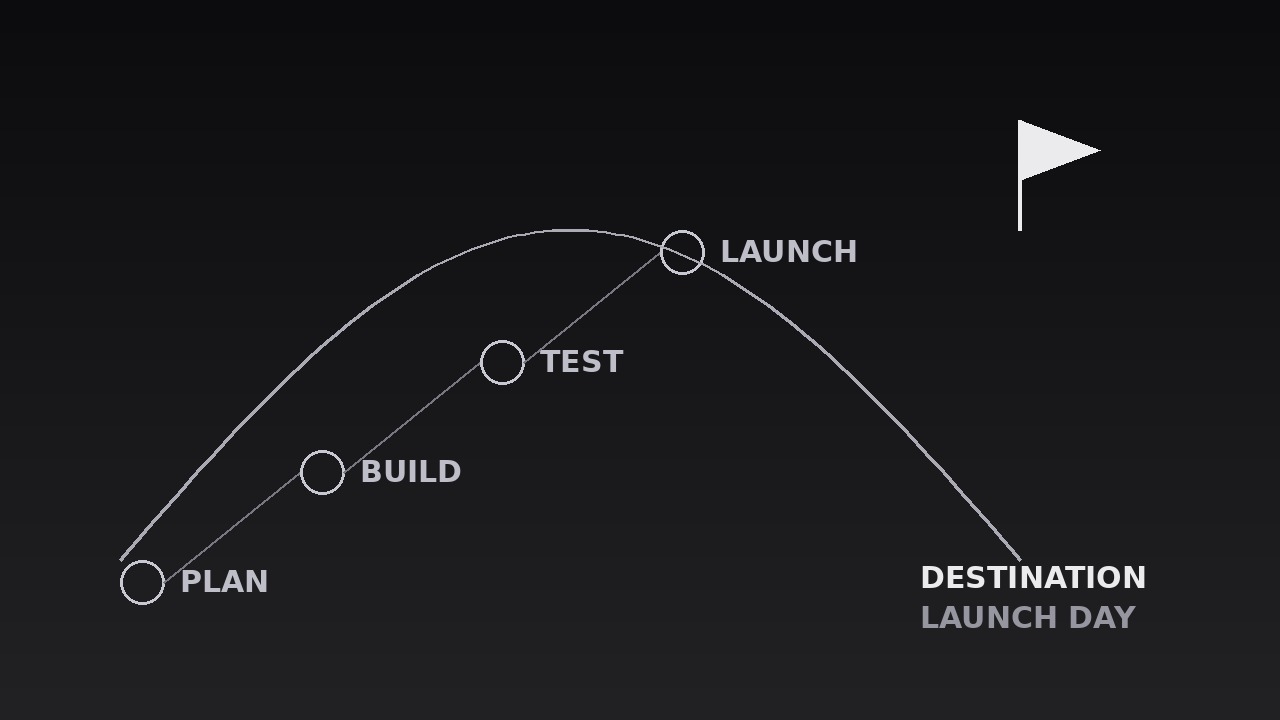
List to Destination Bridge
A checklist becomes a journey with a destination.
Turns your AI into a motion designer for list-to-destination bridges — a checklist of steps arcs across the frame into a single destination, turning a to-do list into a journey with an endpoint. For roadmaps, how-it-works segments, and onboarding where the list only matters because of where it leads.
Install it in 3 steps
No sign-up. No CLI tools. Pick your AI, copy one line, paste it over.
Prefer doing it yourself? Buy the skill ($4.99), download the ZIP from your checkout confirmation, unzip it into the directory shown above, restart your AI session — same result. Already bought it? Your AI assistant can download it for you.
What’s inside
One SKILL.md (the playbook) + one starter template. A preview:
List to Destination Bridge
When to use
- A roadmap or plan video where a list of steps needs to feel like a journey, not a chore list
- A how-it-works segment where the process (steps 1–5) only matters because of the outcome at the end
- An onboarding or tutorial where the learner needs to see both the path and the destination before starting
- A pitch or proposal where the milestones build toward one launch, delivery, or decision
- A checklist video where the items are forgettable alone but meaningful as a route to a goal
- A strategy or curriculum overview where the audience should leave knowing the endpoint first, the steps second
Workflow
- Define the list and the destination (input: your plan → output: steps + endpoint)
Write the steps as 3–6 short items (≤5 words each) in the order they happen, and the destination as one noun phrase ("Launch day", "A signed contract", "Your first sale"). The destination must be a place the journey ends, not another task — if the last item and the destination are the same thing, the bridge leads nowhere. Cut any step that is not on the critical path: a bridge with eight planks sags, and a list with eight steps stops looking like a journey. If two steps always happen together, merge them; the audience counts planks, and every extra one dilutes the arrival. - Lay out the bridge (input: steps + endpoint → output: bridge layout)
Draw the bridge as a single arc or gentle S-curve across the frame: the first step at the lower-left, the destination at the upper-right (or right-of-centre on vertical), with the arc's peak near the middle. Each step sits on the arc as a node — a numbered dot or small card — spaced evenly along the curve, with the destination as the largest node, visually distinct (a flag, a star, a filled marker) and set apart from the step nodes. The arc itself is a thin line (2–3px) in a quiet colour; it is the path, not the decoration. Leave the space beneath the arc mostly empty: the journey needs air under it, and labels need room to breathe. - Label every plank (input: bridge layout → output: labelled steps)
Give each step node a short label (≤5 words) placed consistently — all labels above the arc, or all below it, never mixed — in a size readable on a phone. Add the step number to each node (1, 2, 3...) so the order is unmistakable even with the sound off. The destination gets its full name in type 1.5–2× the step-label size, plus one supporting line beneath it if the destination needs a qualifier ("Launch day — 1 June"). Never label the arc itself with text along the curve: curved text is hard to read and fights the nodes for attention.
Template preview
List to Destination Bridge — Starter Template
A checklist becomes a journey: 3–6 steps on one arc, ending at one destination.
Journey: {title} | Sequence length target: {6–10s}
1. Steps (3–6, ≤5 words each, critical path only)
Cut test: every step is a gate the journey cannot skip — errands cut: [ ]
2. Destination (one noun phrase — a place, not another task)
- Destination: {Launch day / A signed contract / Your first sale / ...}
- Qualifier (one line, optional): {e.g. "1 June" / "in 30 days"}
- Destination ≠ last step check: [ ] (if they are the same, rewrite the destination)